This is an old revision of the document!
11.04. Cash register
The Cash Register allows you to see and create in and out payments for the customers and patients in your store. It also shows you the current balance for different payment types and you can use it to manage cash reconciliation in a store if you are using a physical cash repository of some sort.
Any payments made in the customer receipts module or made on a prescription will also be show here. Those payments differ to those made in this module in that they are attached to a transaction (customer invoice or prescription). Any payments made in this module are not attached to any other transactions.
Viewing the cash register
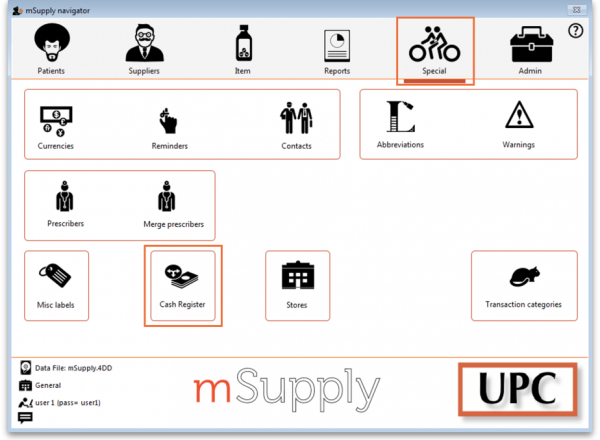
1. Click the Special tab in the navigator.
2. Click the Cash Register button.
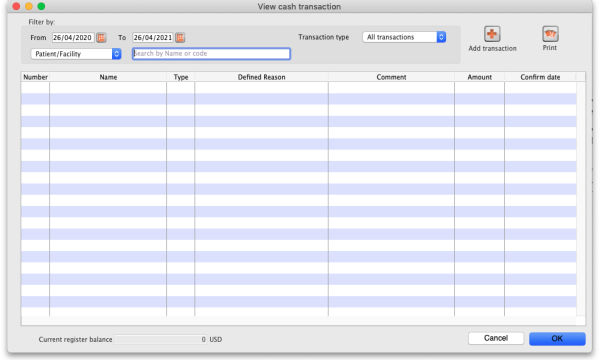
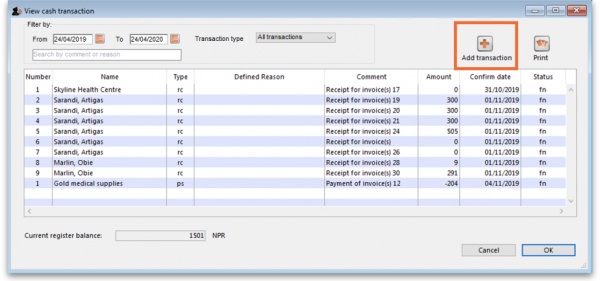
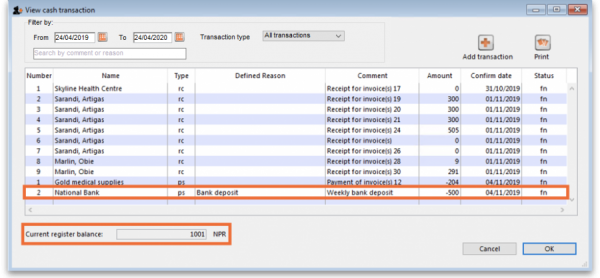
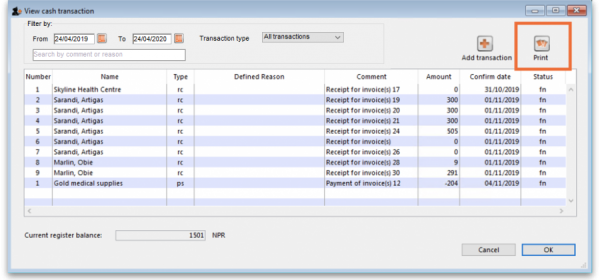
3. The Cash Register will open. You can see the Current register balance and, for each transaction:
- Who the cash was received from or paid to
- Payment type, where rc is a cash receipt and ps is a supplier payment
- Amount received or paid, where a positive number is cash in and a negative number is cash out
- Date of the transaction
- Other details such as reasons and comments
Adding or removing cash
All transactions involving cash movement will be automatically added to the cash register. For example, receiving payments for prescriptions or making payments of supplier invoices.
You can set permissions to allow users to manually add cash in or take cash out from the cash register. For example, this may be necessary for depositing cash in the bank.
Permissions for manual cash in/out transactions
1. Go to Admin > Edit Users > double click user name.
2. In the Permissions (2) tab, check the Create cash transactions box to allow the user to perform manual cash in/out transactions.
3. Click OK until you return to the navigator screen.
Manual cash in/out transactions
Once permissions are set:
1. Click the Special tab in the navigator.
2. Click the Cash Register button.
3. Click the Add transaction button. Note: If the user does not have permission to make cash register transactions, an error message will appear and they will not be able to proceed.
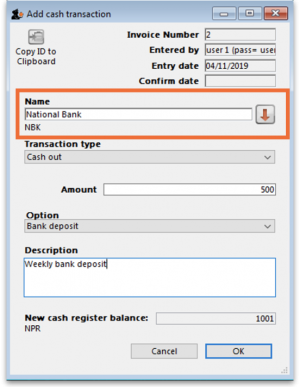
4. Add the Name of the person/organisation to which the transaction relates.
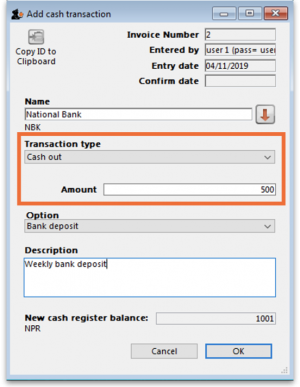
5. Select the Transaction Type from the dropdown list: Cash out (remove) or Cash in (add).
6. Enter the Amount of cash being removed or added.
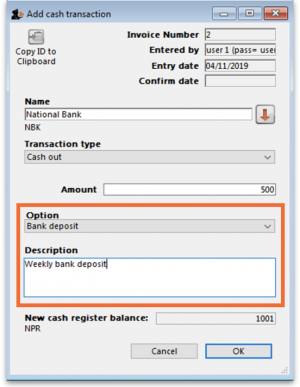
7. If you are making a cash out transaction and the Option dropdown list is activated, you must select a reason for removing cash. You may also add a Description to give further details of the transaction.
You can set a list of standard Options for the user to select from when removing cash from the register.
8. Review the New Cash Register Balance, which will be automatically calculated.
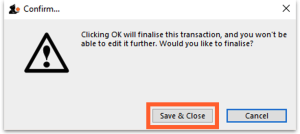
9. Click OK, then click Save & Close to finalise the transaction. Once finalised, the transaction can no longer be edited.
10. The new transaction will now appear in your cash register and the Current register balance will be updated.
Printing a cash transaction report
1. Click the Special tab in the navigator.
2. Click the Cash Register button.
3. Click the Print button.
4. An Excel spreadsheet will open containing the same information as the cash register window. You can now save and/or print the spreadsheet from Excel.
| Previous: 11.03. Prescription payments and credits | | Next: 12. Reports |
