28.02. Remote Support - Installing TeamViewer
Over the years we have used a number of applications for providing remote support to clients. As of writing this (January 2020) TeamViewer is the software that we use.
By following the installation process below, mSupply Support will be given unattended access to the computer. This means mSupply Support can access the computer without user interaction. With unattended access, providing support and requesting support is easier and will save both the support team and the mSupply user valuable time.
If you do not wish for mSupply Support to have unattended access, you can install standard TeamViewer here. If you are not using our customised installer, any support requests for mSupply support to connect to a device will require a TeamViewer ID and password.
It is highly recommended that you rename your computer and use our customised TeamViewer.
Installing the TeamViewer Host customised for mSupply
- Uninstall - If TeamViewer is already installed on the machine, it is safest to uninstall it.
- Recommended - Change the Computer Name to something meaningful before installing TeamViewer. Using a name that reflects the site and / or user will help mSupply support identify the device e.g.
Auckland - Grafton Pharmacy- This is what the machine will show up as on our internal directory. If you do not rename the computer, we will probably request the user send us their TeamViewer credentials for remote access every time support is required.
The TeamViewer Host module appears to only use the first 15 characters of the name. If you are connecting several computers, make sure that the first 15 characters are unique for each computer.
To change the computer name in Windows go to: Control Panel > System and Security > System > Advanced system settings > Computer Name > Change…
Computer description is NOT the Computer Name
- Download and save the zip file at the following link https://www.msupply.org.nz/files/Teamviewer/TeamViewer%20Deployment%20December%202025.zip
- Extract the files from the TeamViewer Deployment .zip file onto the host computer.
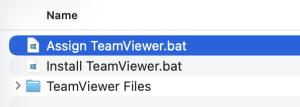
- Open the folder you extracted
- Run as administrator - right click on the file
Install TeamViewer.batand select Run as administrator. The script will check to see if it is running as an Administrator, if it isn't running as an Administrator, the installation will stop. If TeamViewer is already installed, you can try and useAssign TeamViewer.batinstead.
The Teamviewer Customised Host window should appear on your screen:
If the above window does not appear, the full installation has not completed. It definitely helps to run the batch (Install TeamViewer.bat) file with a reasonable internet connection. If the internet connection is not good enough, then some or all of the actions in the batch file will not be complete. If that happens, please uninstall TeamViewer and re-run the batch file (as Admin) when the internet connection is better.
- Notify mSupply Support by message or email (on support@msupply.org.nz) and give us the computer name of your computer (If using our custom TeamViewer installer). Otherwise, the TeamViewer ID should also work (a screenshot is fine). We will then be able to confirm for you that the remote access is operational and ready for us to provide you remote support.


